정규 방정식 구현하기
파이썬으로 정규방정식을 구현하는 아이디어를 살펴보자.
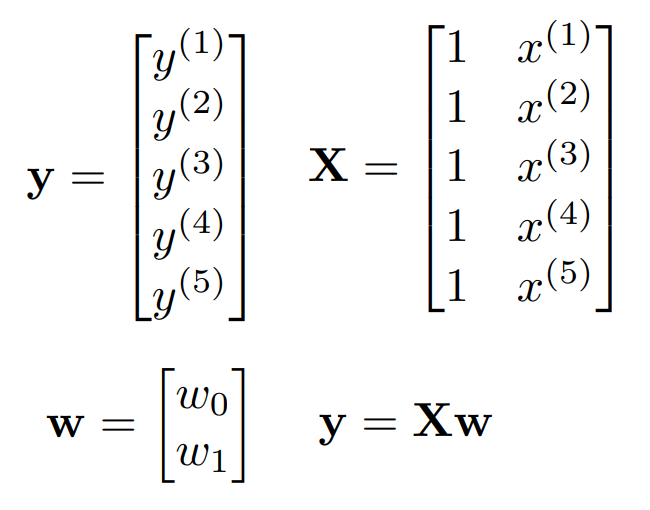
먼저, X와 y를 입력으로 받아서 크기를 조정해준다.
def fit(self, X, y):
    self._new_X = np.array(X)
    y = y.reshape(-1, 1)
그리고 상수항(절편)에 해당하는 벡터를 만들어준다. 이 벡터는 당연히 X에 합쳐야(concatenate) 한다.
if self.fit_intercept:
    intercept_vector = np.ones([len(sefl._new_X), 1])
    self._new_X = np.concatenate(
      [intercept_vector, self._new_X], axis=1)
이제 정규방정식으로 가중치 행렬을 만들어 주자. 마지막에 flatten()를 이용해 1차원으로 바꾸어 준다.
weights = np.dot(np.linalg.inv(
  np.dot(self._new_X.T, self._new_X)),
  self._new_X.T).dot(y).flatten()
좀 복잡해 보이지만 지난 시간에 강조한 정규방정식을 구현한 것이다.
\[\hat{w} = (X^{T}X)^{-1}X^{T}y\]이렇게 구한 가중치 행렬을 각 변수에 할당해주면 된다.
선형 회귀 모델을 이용해서 예측값 구하기
예측값을 구하는 과정은 매우 간단하다. 아래 과정을 구현하면 끝이다.

def predict(self, X):
    test_X = np.array(X)

    if self.fit_intercept:
        intercept_vector = np.ones([len(test_X), 1])
        test_X = np.concatenate([
          intercept_vector, test_X], axis=1)

        weights = np.concatenate([
          self.intercept], self._coef, axis = 0)

    else:
        weights = self._coef

    return test_X.dot(weights)
나머지 부분은 앞서 살펴본 정규 방정식 과정과 유사하고, 마지막 리턴 값이 이 코드의 핵심이다.
별도의 출처 표시가 있는 이미지를 제외한 모든 이미지는 강의자료에서 발췌하였음을 밝힙니다.

댓글남기기